

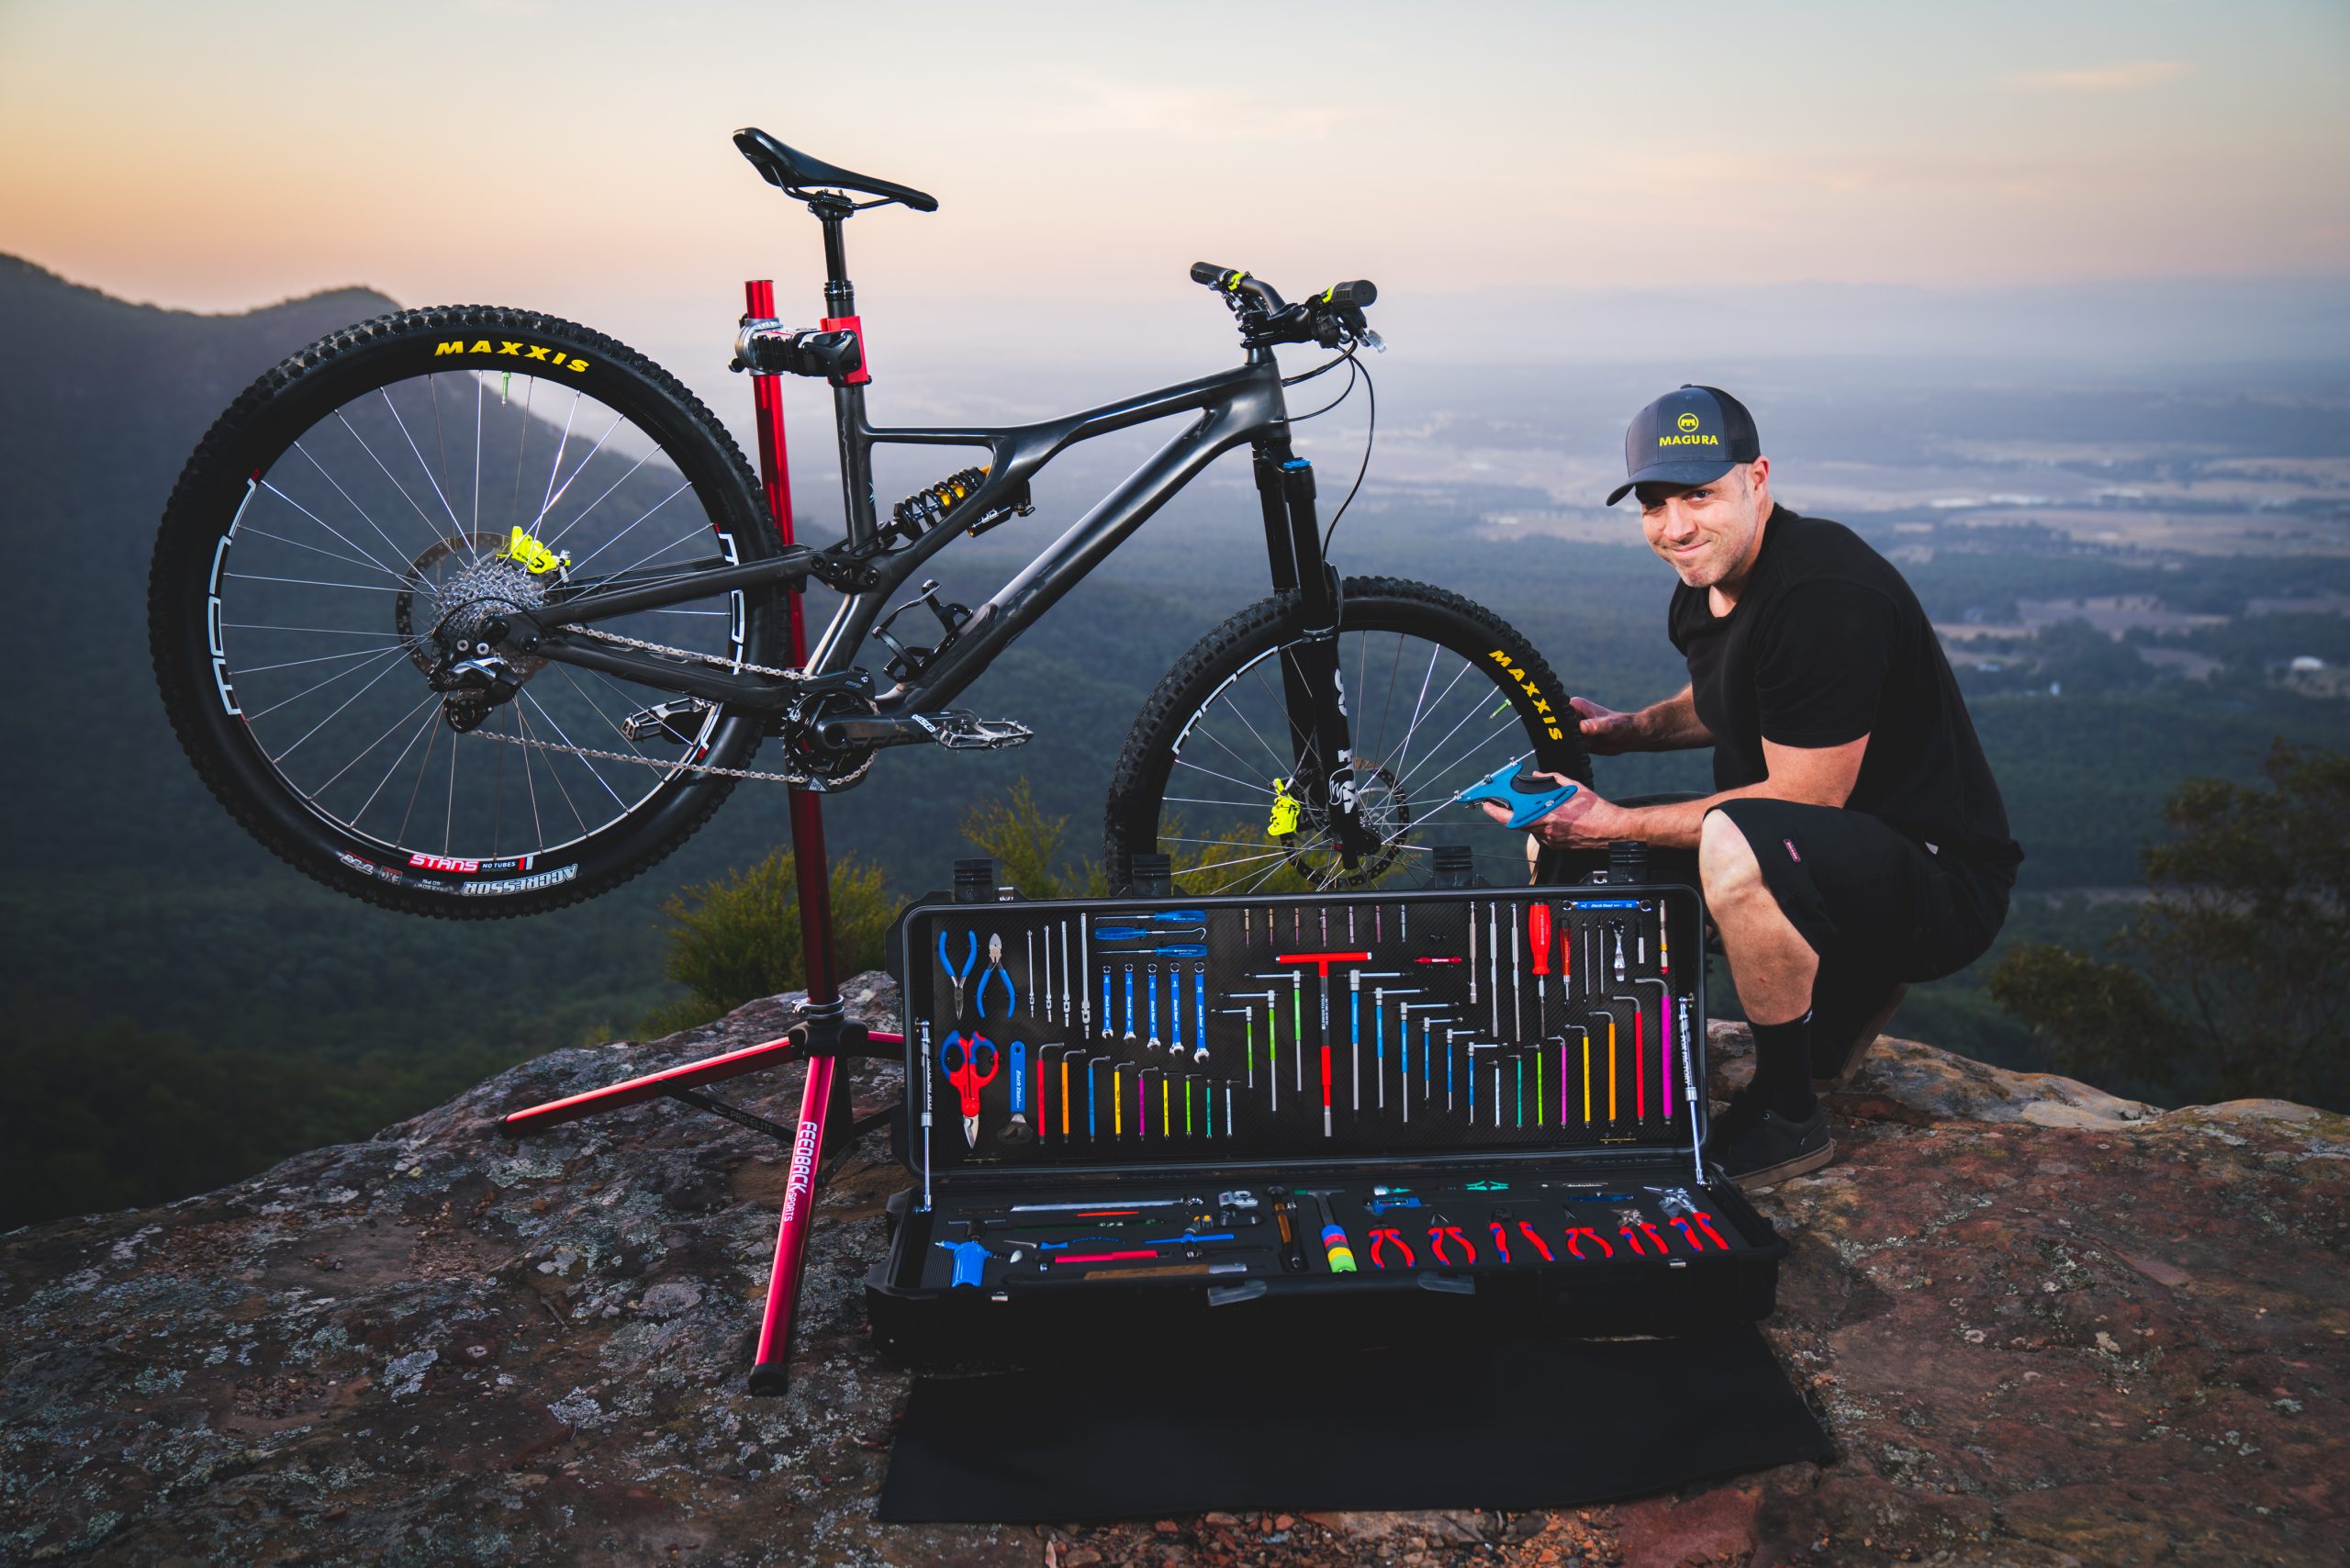
The Abbey Bike Tools ‘Toolbox Wars’ World Championships is an annual contest which sees the most impressive custom toolboxes from all across the globe judged and voted online by the masses.
What is a custom toolbox? Well, unlike most of us who store our bike tools by randomly throwing them into a plastic container like some sort of hot mess, there is a growing number of bike mechanics that go to extreme lengths to handcraft the internal compartment of their tool boxes to perfectly house each of their beloved tools. Needless to say, the Abbey Bike Tools ‘Toolbox Wars’ competition is the most prestigious award in the world of bike mechanics. The contest was only launched last year but its popularity exploded overnight. ‘Ol school Aussie DH legend turned bike mechanic guru Brad Kelly managed to win last year’s contest. Inspired by his victory and feeling that there was still a little room for improvement in the design and configuration of his existing toolbox Brad decided to up the ante and embark on customising a brand new box. He then spent several painstaking months (as well as countless hours and dollars) meticulously hand crafting a new masterpiece. Brad managed to get it completed just in time for this year’s Toolbox Wars and guess what? He once again blew the competition apart claiming victory thanks to tens of thousands of votes from around the globe. We recently caught up with the man himself for a chat about how it all went down.
 [R]: Back-to-back champion, congratulations mate! Jeez, where do we even begin with talking about the insane detail of your latest toolbox? I guess firstly, you won the title with a different box last year, and that box was already amazing, what was it that you felt you could improve upon and inspired this new design?
Brad: Thanks mate! Yeah It was really cool to win the comp last year in its 1st year but to win it again this year against all the other mechanics and their set ups is pretty awesome! The main goal with the new set up was to improve on efficiency. My last toolbox had 3 layers and it got quite frustrating having to pull layers out all the time to access everything.
The actual shell of the box is a gun case, eh?
Yep, that’s right. I fitted out a rifle case. The whole idea behind the rifle case was to have everything spread out more, have less layers, and prevent the need to have to pull anything out and to be able to access everything quickly. It also has wheels which is really handy for transporting around.
Once you pick a new toolbox it comes totally empty, where do you then begin with designing and building out the internal configuration?
This set up with the shelf and struts was actually quite hard and complex.


“I had all these ideas but there was no way of knowing if it was all going to work before actually getting started and working it all out 1 step at a time. “
Tell us a bit about the shelves you’ve created in there?
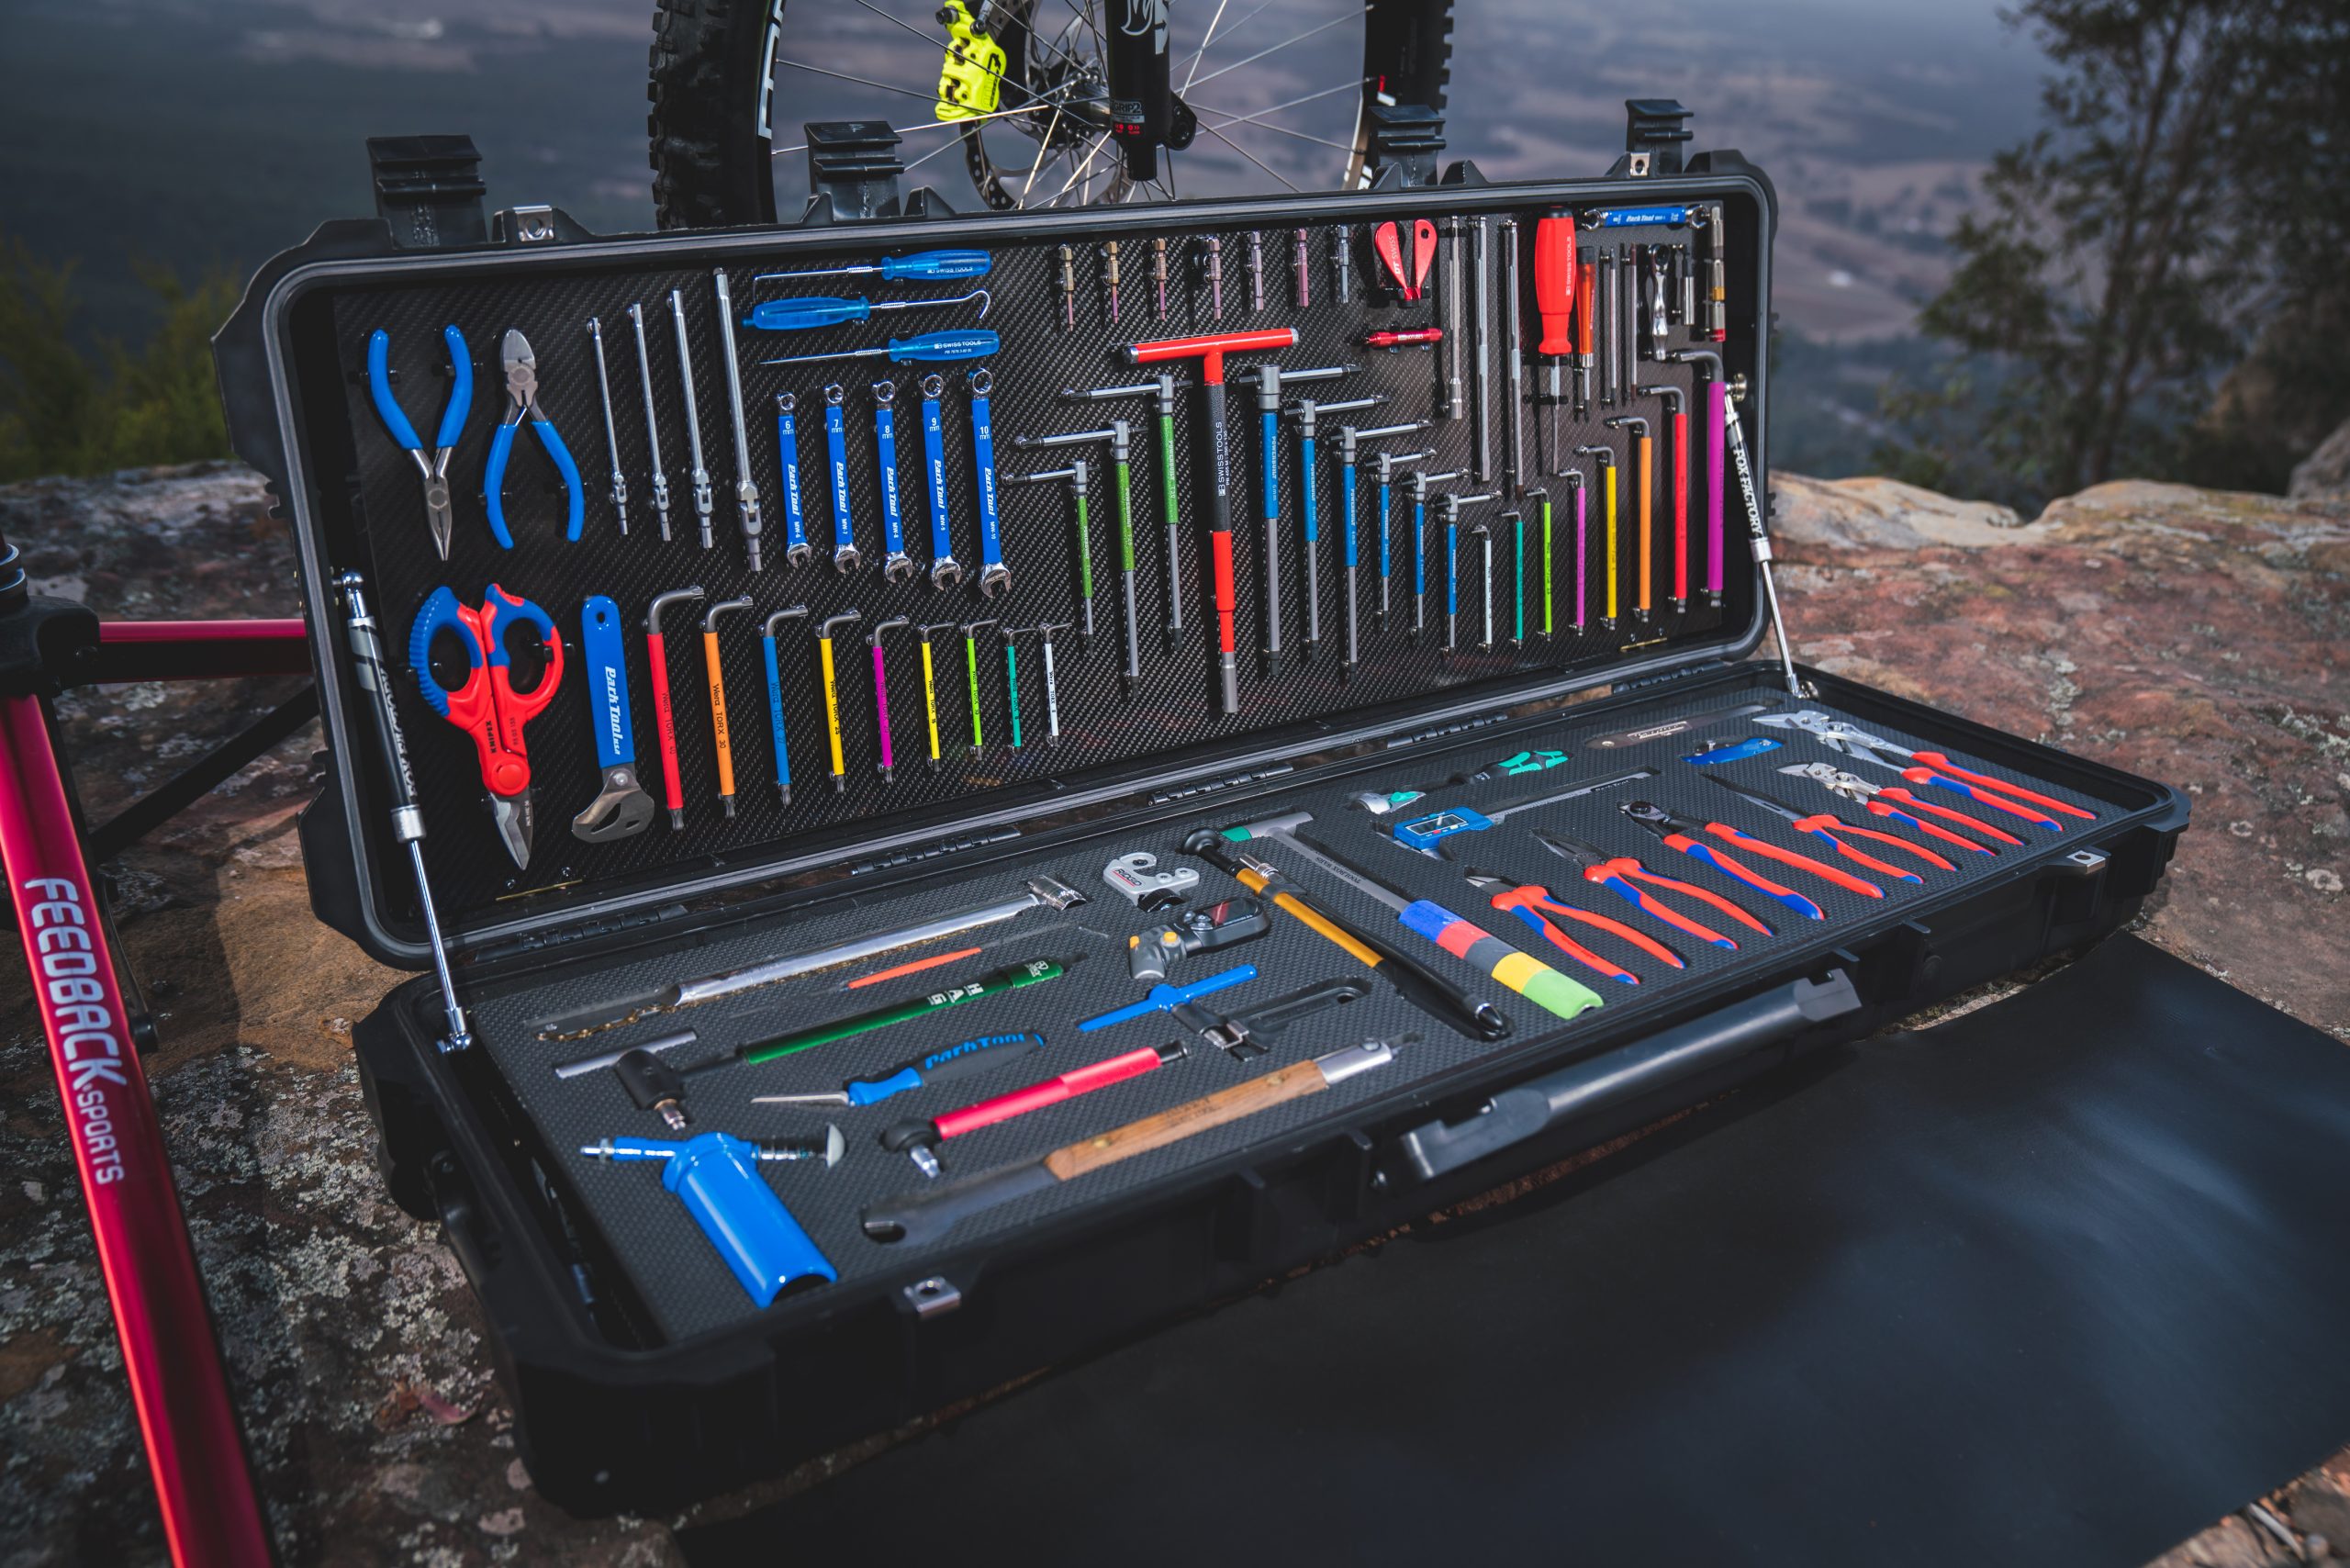
The shelf is a custom piece of 1020 x 340 2mm thick carbon fibre board I had made up which is fastened into an aluminium angle frame I made which houses the top layer of foam. The toolboard is the same size which is also made from carbon fibre and I have used magnets to attach tools to the board for a clean look and also not having to push tools into a clip.
You’ve even got mini gas struts attached in there too, eh?
Yeah that’s right. The struts were one of the things I worked out I needed once I started the build as the rifle case I got didn’t have stops on the lid and butterflied all the way open. I used the 1st pair of struts to control where I wanted the lid/toolboard to sit. The 2nd pair of struts I attached to the shelf so you could flip it up and access the bottom layer while keeping both hands free to work with.
How many hours would you guess that you’ve spent working on this toolbox?
I don’t like to think about all the time I spent on this box haha! It’s probably around 40-50hrs actually building it but over a few months getting ideas, thinking it all through and a bit of trial and error. I spent many rides where all I was thinking about was toolbox ideas.
What is the process in outlining and cutting each of the tool slots?
The process is a little different for me. There are quite a few companies like Kaizen and Shadow foam that make pre glued layered foam sheets where you trace around tools and then pick out layers to suit the contour of each tool, which is probably much easier and was my original plan. But the pre glued foam was fairly expensive and I wasn’t sure how many layers or what thickness I needed so I decided to experiment with a cheaper option which was EVA foam floor mats from Clark Rubber which I cut and then glued together myself. In the end I decided to stick with the foam floor mats as decided I liked the look of them more and liked the fact that they were different to what everyone else was using. The EVA foam is denser and more durable as it’s designed to be walked on and the cuts look a little sharper. I use a blunt pick to outline the tools as it forms a groove for the blades to sit in. Then cut with either a razor or scalpel.
Considering you’ve got so many different tool cutouts on each piece of foam for each shelf, does it get pretty nerve racking not to mess up any of the cuts as it could jeopardise an entire section and you’d have to start again?
Haha yeah it does a little. Although I start off all the cuts on the tight side to try to avoid any major stuff ups but it’s super hard to just cut 1 or 2mm off the foam when the tool is a bit too tight for easy removal. I flipped the pin on a soldering iron and adjust the tool fits by melting which keeps all the edges looking pretty sharp.
Besides the foam cut-outs keeping each tool house nice and neatly you also have to build ‘pull’ into each of the slots so that you can easily access a given tool. Can you explain how that works?
Yep, it’s pretty much purely for aesthetics as I think it looks a lot cleaner without finger holes everywhere. I keep the cut outs from the tools, splice and cut into sections and glue into place to create voids under one or both ends of the tool so by pushing one end of the tool down the other end pop’s up. Works really well and super easy to remove the tools.

How many tools do you have housed in there?
There is over 130 tools with the versatility of having bits and multiple bit handle tool options.
What is the total weight of the box?
The total weight fully loaded including some spares is 26kg. Although there’s a few unnecessary tools which can be removed to reduce weight if needed.
Is the case 100% finished now or is it a bit of a constant work in production?
Yep it’s pretty much all done! I’ve spent the last couple of weeks working out of it and haven’t found anything that needs changing yet.
Cheers for taking the time to chat with us today mate.
My pleasure mate, anytime!